6.11.5 Polar Graph with Multiple Layerspolar-multi-layer
Summary
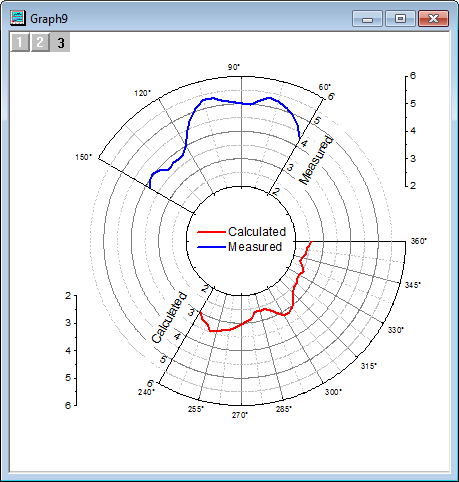
The multi-layered graph allows the placement of several polar plots with different ranges on one graph page. This graph is generated by first creating 3 independent polar graphs, and then using the merge graph function to combine the three graph pages into one three-layer polar graph.
Minimum Origin Version Required: 2015 SR0
What You Will Learn
This tutorial will show you how to:
- Customize the Angular axis and Radial axis.
- Duplicate a graph with new data.
- Create multi-layered polar graph.
- Create one legend for the whole page.
Steps
This tutorial is associated with the Tutorial Data.opj file under the <Origin EXE Folder>\Samples\ path.
Create a Polar Graph for the Measured Data
- Open the Tutorial Data.opj file and browse to the folder Polar Graph with Multiple Layers. Double-click the workbook Book26 to open the workbook window.
- Highlight Column A and Column B and select Plot > Specialized: Polar θ(X) r(Y) from the main menu to create the polar graph.

- Double-click on any tick label of the Angular axis to open the dialog. Go to the Scale tab for Angular axis. Set the Scale of the Angular Axes as From 60 To 150. Set the Value for increments under Major Ticks as 30. Click the Apply button to see the changes on the graph.

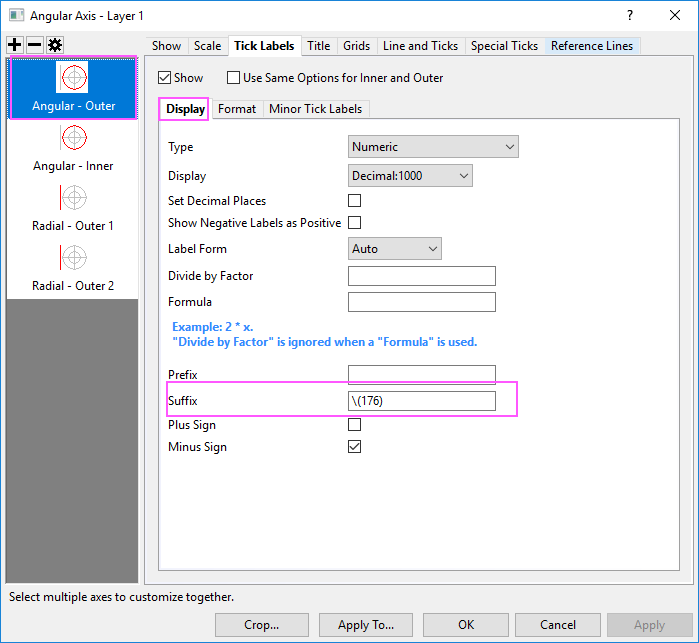
- Go to Tick Labels tab and make sure Angular - Outer is selected in the left panel. Under Display subtab, type \(176) in the Suffix text box to add the degree symbol to the Angular tick labels. For more details of supported text formatting commands, please refer to the escape sequences page.
- Click the New Configuration... button to open the Radial Axes Configuration dialog.
- Check the Axes Inside Polar box and configure it as shown below:
- Set the Angles List as Custom.
- Set the Value text box as 60 150 to place an axis at 60 degrees and one at 150 degrees.
- Set the Axes Outside Polar options as shown below:
- Select Upper from the Right option drop-down to place an axis at the upper right of the layer frame.
- Set %s of Radius as 0.
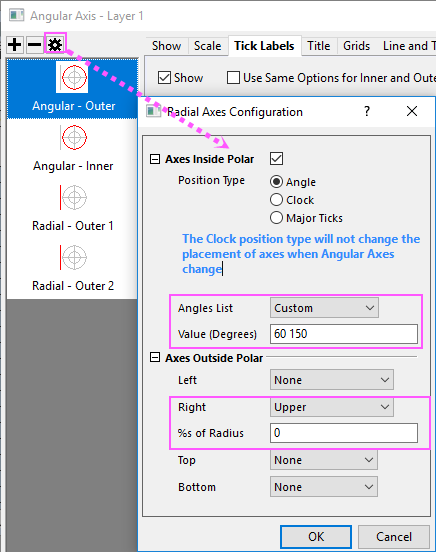
Click OK to apply the settings.
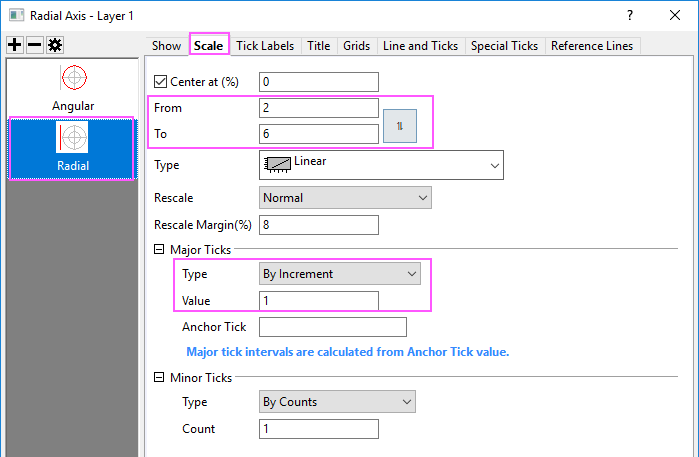
- Go to Scale tab, and select Radial in the left panel. Set radial axis From as 2 and To as 6. Change the increment Value for the Major Ticks to 1.
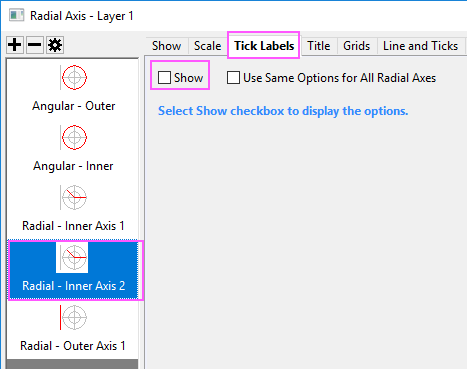
- Go to Tick Labels tab and select Radial - Inner 2 in the left panel. Uncheck Show check box to hide the tick labels for this axis.
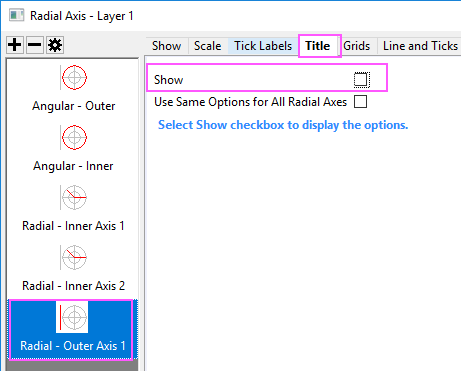
- Go to Title tab and select Radial - Outer 1 in the left panel. Uncheck Show check box to hide the title of the outside polar axis. Click the OK button.
- Double-click the plot to open the Plot Details dialog. In the left panel of the Plot Details dialog, click the Graphn page to go to the page level of this dialog. In the Legends/Titles tab, deselect the check box Indicate Active Dataset, so that the red box around the legend symbol will be hidden.
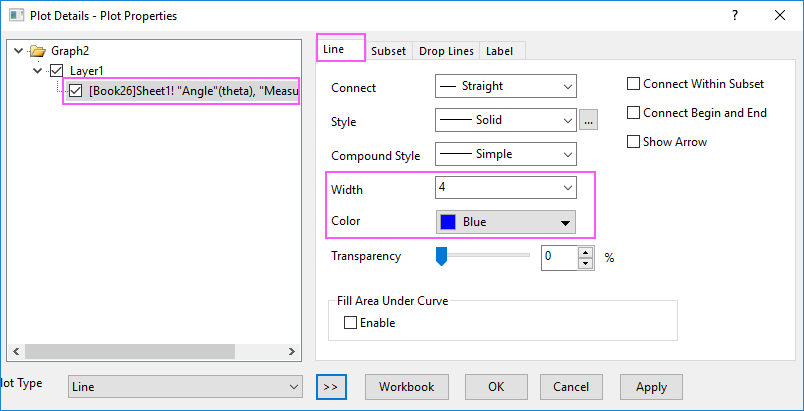
- Expand the Layer node on the left panel and select the graph under it. On the Line tab in the right panel, change Width to 4 and Color to Blue.
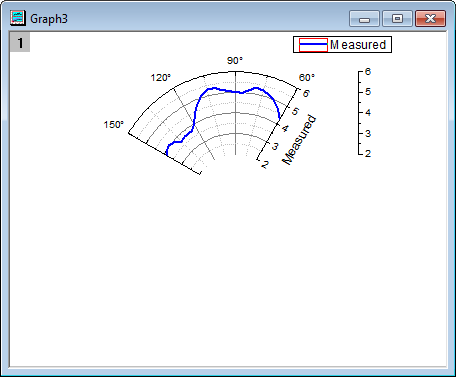
- Click the OK button to apply customizations to the first polar graph.
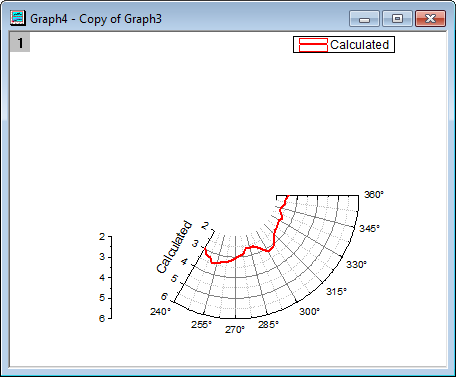
Duplicate a Polar Graph with the Calculated Data
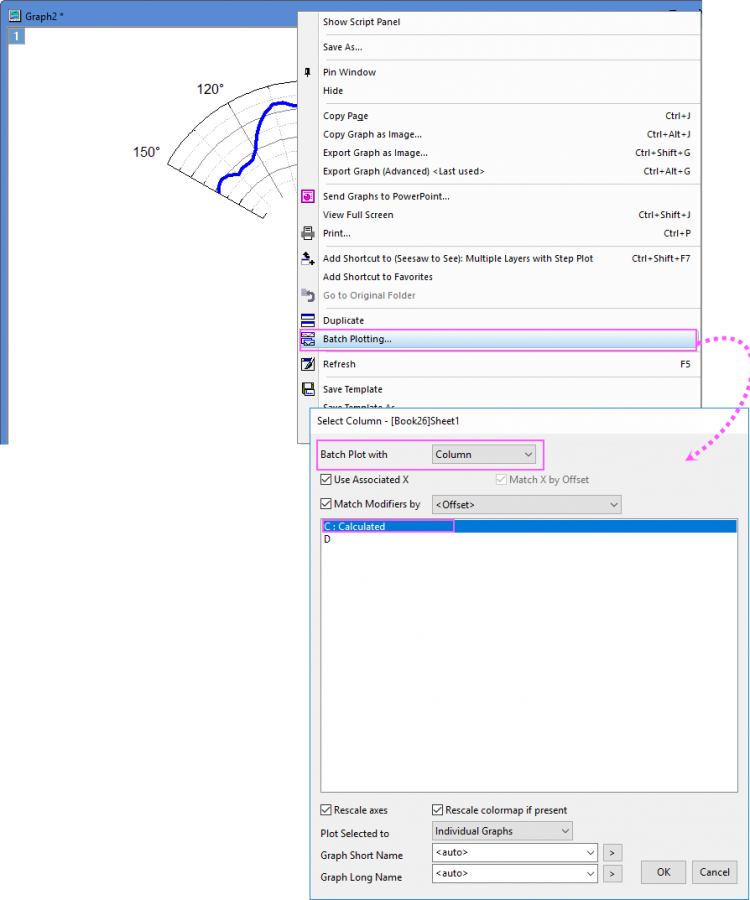
- Right-click the header of the polar graph to open the shortcut menu. Select Batch Plotting... to open the batch plotting dialog. Select Column from Batch Plot with dropdown list. Select the column C:Calculated and click OK to duplicate a polar graph with data from Column C.
- Since the data range in Column C is quite different from Column B, the Reminder Message window will pop up, asking whether to rescale the axes of the new graph to show all data. Leave the Yes radio button selected and click OK.
- Follow steps 3 from the last section to set the scale of the Angular Axes. Set From as 240 and To as 360 and the increment of the Major Ticks to 15.
- On the Scale tab, choose Radial in the left panel and then set From as 2 and To as 6 and the increment of the Major Ticks as 1.
- Go to Show tab
- Choose Radial - Inner 1 in the left panel. Under Axis Position section, set the Value (Degrees) as 240 to move the first inside polar axis to 240 degrees.
- Choose Radial - Inner 2 in the left panel. Set the Value (Degrees) as 360.
- Choose Radial - Outer 3 in the left panel. Select Left-Lower in Axis at drop-down list to move the outside axis to the lower left of the layer frame.
Click the OK button to finish customizing the axes.
- Double click the plot to open the Plot Details dialog. Change the line Color to Red and Width to 4 in the Line tab. Click OK.
Create a Polar Graph to Show Full Range Grids
- Open the workbook Book26.
- Select Column D and click the Polar theta(X) r(Y)
 button in the 2D Toolbar to create an empty polar graph. button in the 2D Toolbar to create an empty polar graph.
- Repeat steps 3 in the Create the Polar graph for the Measured data section to set the scale of the Angular Axes as From 0 To 360 and the increment Value of the Major Ticks as 30.
- Go to Show tab, select Angular - Outer on the left panel and uncheck show box. Then select Angular - Inner on the left panel and check Show box.
- Go to Tick Labels tab, select Angular - Inner in the left panel, and uncheck the Show check box to hide the tick labels of the inner Angular axis.
- Go to Grids tab, make sure Angular is selected in the left panel. Uncheck the Show option in the Major Grid Lines and the Minor Grid Lines sections.
- Go to Scale tab, select Radial in the left panel, and change the scale From 2 To 6 and set the increment Value of the Major Ticks as 1.
- Go to Show tab, select Radial - Outer 1, and check Use Same Options for All Radial Axes. This will apply the settings on this page to Radial - Outer 2 axis as well. And then uncheck Show check box. Click the OK button.
Create the Multi-layered Graph with One Legend
- With a graph window activated, select Graph: Merge Graph Window from the main menu.
- Set the Merge option as Specified and make sure only Graph1, Graph2 and Graph3 (the three new graphs just created) are selected in the Graphs text box.
- In the Arrange Settings section set both Number of Rows and Number of Columns to 1 to overlay the three graphs.
- Check the box next to Link Source Graphs.
- In the Page Setup section, set both Width and Height to 15.
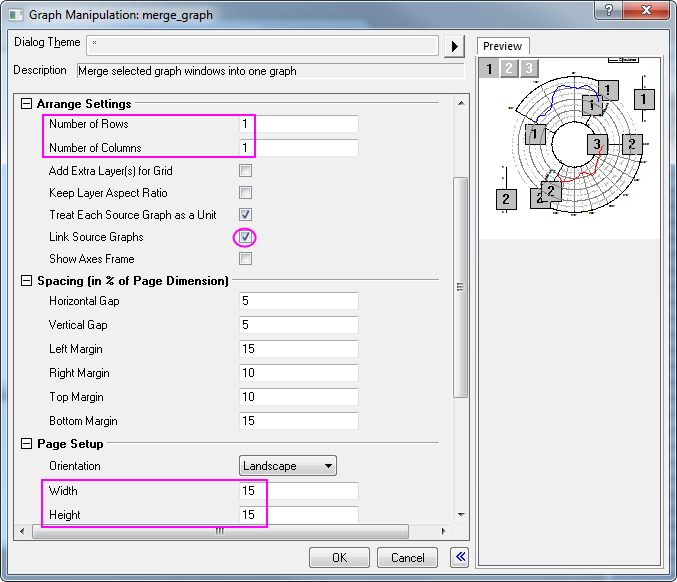
- The preview of the graph can be seen in the right panel.
- Keep the rest of the default settings and click OK.
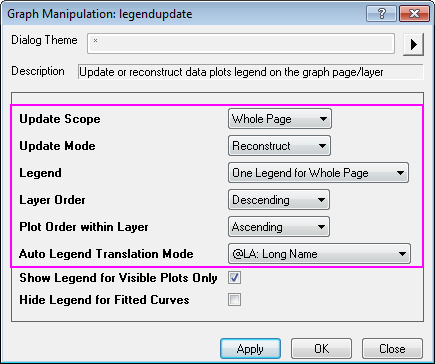
- Right-click the legend and select Legend: Update Legend from the shortcut menu, to open the dialog.
- Set the Update Mode to Reconstruct to create a new legend.
- Set the Legend to One Legend for Whole Page to create only one legend for this multi-layered graph.
- Set the Layer Order as Descending to place the Layer 2 legend above the Layer 1 legend.
- Set the Auto Legend Translation Mode as @LA: Long Name to use the Long Name data for the legend. Click OK.
- Right-click on the new legend and select Properties... to open the dialog.
- Delete the first line in the lower text box.
- On the Frame tab, set Frame to None. Click OK.
- Drag the legend to the center of the inner Angular axis.
- Use the Font Size
 text box to change the size of the fonts on this graph. Drag the tick labels to move them to an appropriate position. text box to change the size of the fonts on this graph. Drag the tick labels to move them to an appropriate position.
- Right-click one of the inner radial axis titles (Calculated or Measured) and select Properties... from the shortcut menu.
- In the Object Properties dialog that opens, in the Frame tab, choose the None from Frame drop-down list. This clears the grid lines and other background from behind the axis title making it easier to read. Click OK.
- Repeat the same operation for the other inner radial axis title.
- The final graph should appear as shown below:
|