6.16 Piper Diagram
piper-diagram
Summary
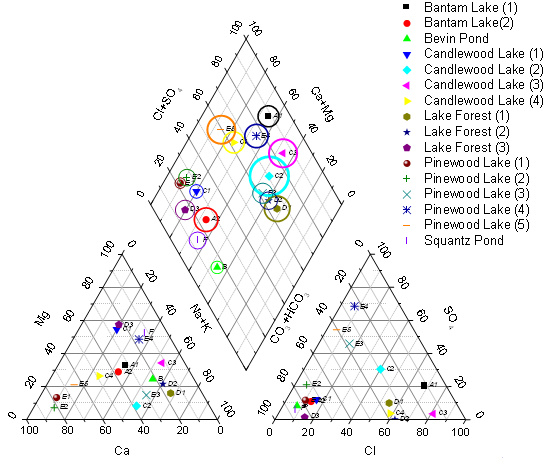
Piper diagram (or Trilinear diagram) is used as an effective graphical representation of chemistry in water samples in hydro-geological studies. The percentage values of six ion groups are considered in the plot, they are calcium, magnesium and sodium plus potassium cations, and sulfate, chloride and carbonate plus hydrogen carbonate anions.
The cations and anions are shown by two separate ternary plots and both are then projected onto a rhomb. In Origin they are plotted as a three layer graph.
What will you learn
This tutorial will show you how to:
- create a piper plot from percentage data
- customize the gap between ternary and rhomb in piper graph
- add data labels in the piper plot
Steps
- Start a new workbook and select Data: Connect to File: Text/CSV to import the file Piper.dat under <Origin EXE Folder>\Samples\Graphing path.
- In the imported worksheet, column A is the Sample ID. Column B through G are the percentage values for the six ion groups in the order of Ca, Mg, Na+K, Cl, SO4, and CO3+HCO3. column H is the amount of total dissolved solids in water. The percentage for cation groups is relative to the total amount of cations and that of anion groups is calculated by the same manner.
- Note: We have some built-in workbook templates to help you convert data from different units (MEq/mgL/PPM) to percentage (open from File:New:From Template:). For details, please refer to this help file.
- Highlight column B through G and select Plot > Specialized : Piper from the top menu to open the plotpiper dialog.
- Select column A for Sample ID and column H for Total Dissolved Solids.
-
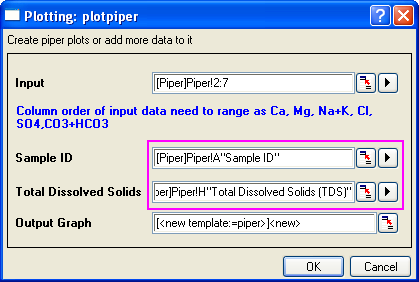
- Note: You can select an existing piper diagram as the Output Graph and add the selected new data into this piper diagram.
- Click OK to generate the piper plot:
-
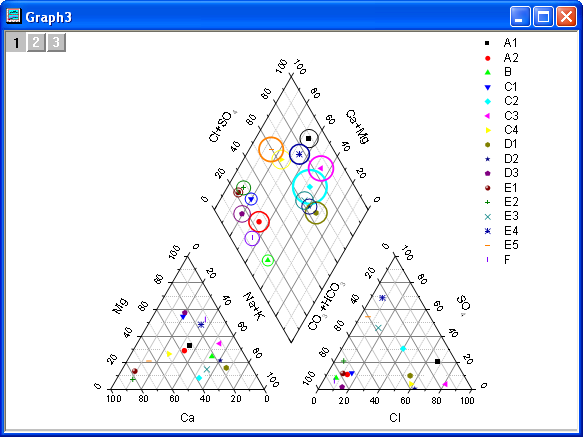
- Sample ID and TDS are optional when plotting piper diagram. If Sample ID is specified, symbol color and shape will be controlled by it. If TDS is specified, open circle in the rhomb (Layer 1) will show and the size will be controlled by it. Also Piper diagram shows each sample in legend.
More Customization Steps
The following steps can further customize the graph to be exactly the same as the image in Summary.
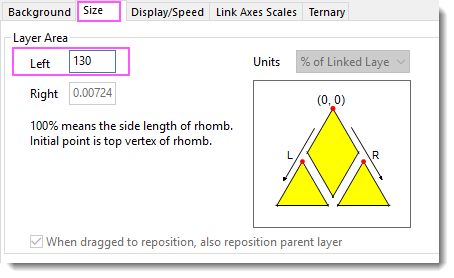
- To change the gap between the ternary plots and the rhomb, double click the bottom left ternary to open the Plot Details dialog. On the left panel, select Layer 2. On Size tab, change the Left value to be 130, so that the distance between the top vertex of rhomb and the top vertex of the ternary in Layer 2 will be 130% of the side length of rhomb. Click Apply button.
-
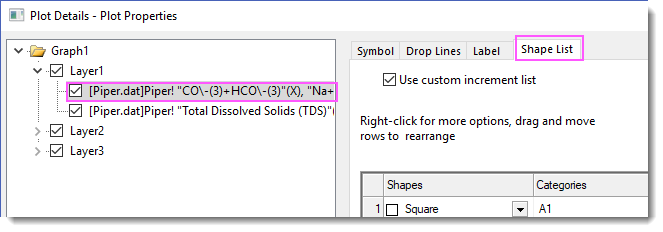
- To change the symbol color or shape increment list, select the 1st plot under Layer 1 node on the left panel. Then select Symbol tab> Symbol Color> By Points to customize the color list, or Shape List tab to customize shape list.
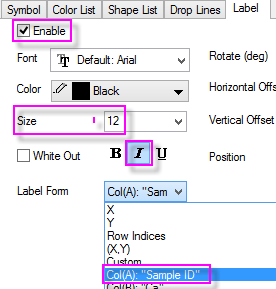
- To add Sample ID as data label in the rhomb, Select 1st data plot under Layer 1 node on the left panel. Go to Label tab and set as follows:
 - To add data labels to two ternaries in the graph, please select plot under Layer2 and Layer3 nodes in the Plot Details dialog and do the same.
- The 2nd data plot under Layer1 node in the Plot Details dialog is the open circle for TDS. Select the data plot on left panel and select the Symbol tab. You can see the Size of the open circle is controlled by Col(H). The Scaling Factor is auto determined to get a proper display. Change the Scaling Factor to 0.03 to see the change.
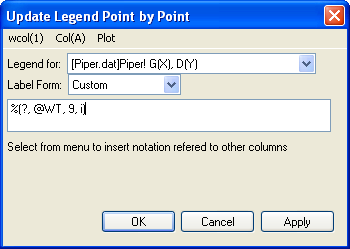
- By default Sample ID shows in legend. To show sampling location's information in legend, right click on the legend and select Legend:Point by Point... to open the Update Legend Point by Point dialog. Select Custom for the Label Form drop-down list and then select wcol(1): wcol(9) from the menu. wcol(9) refers to the 9th's column in worksheet, which is the Sampling Location column.
|