11.2.7 Accessing Internal Origin Objects by Origin COC-Access-Internal-Object
Summary
Internal Origin objects (such as Project Explorer folders, Origin windows (pages), layers, plots, graphic objects, data sets, etc.) are accessed using Origin C classes. To access or programmatically control an internal Origin object, you must attach it to an Origin C object.
To attach something to an internal Origin object you must first "find" it using the properties, methods, and collections of a container class. Common container classes include the Project, Folder, Page, GraphPage, Layer, GraphLayer, Worksheet, MatrixLayer, and Collection classes. Once found, an internal Origin object can easily be attached to an Origin C object of the appropriate type.
The internal Origin object is then programmatically controlled by manipulating the class methods and properties of the attached Origin C object. The objective of this tutorial is to demonstrate how to find particular internal Origin objects, attach things to those objects, and access the objects by manipulating the methods and properties of the attached Origin C objects.
Minimum Origin Version Required: Origin 8.1 SR1
What you will learn
This tutorial will show you how to:
- Access Worksheet Related Objects
- Access Graph Related Objects
Accessing Worksheet Related Objects
Familiarity with the Origin C Project class (Project.h), the Collection class (Collection.h), and the Folder class (Folder.h), is valuable when attempting to understand how to find particular internal Origin Objects. Users may find it helpful to preview these classes in the Origin C Reference: Classes book of Origin C Help or in the above header files located in the ..\Origin\OriginC\system subfolder.
To begin this tutorial:
- Download this zip file, extract it.
- On the Standard toolbar, click the New Project button
 . .
- On the Standard toolbar, click the Code Builder button
 . .
- On the Code Builder menu, select File: New Workspace.
- On the Code Builder menu, click the Open button
 . .
- Open the unzipped folder created at step 1, browse to the \Origin C Examples\Programming Guide\Introduction to Accessing Origin Objects folder in the Origin software directory, select AccessWorksheetObjectsTutorial.c, check the Add to Workspace check box and click Open.
- On the Code Builder toolbar, click the Rebuild All button
 . This compiles and links the file. . This compiles and links the file.
- On the Code Builder View menu, verify that the LabTalk Console (Command & Results) and the Local Variables windows are visible (the corresponding menu items should be checked).
- From the Code Builder menu, select Tools: Customize. Select the Toolbars tab and make sure that the Debug toolbar check box is selected.
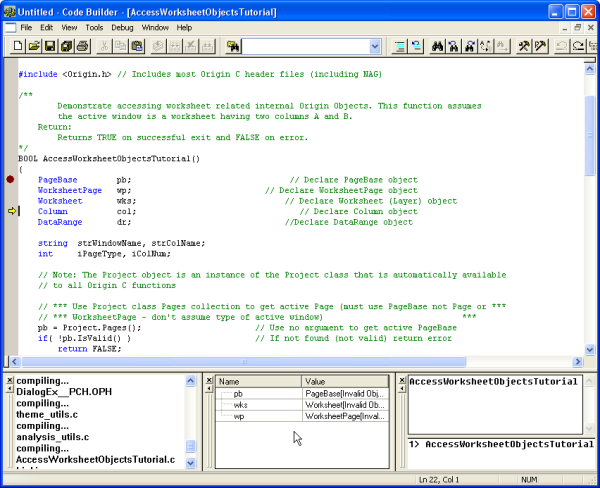
- In Code Builder, activate AccessWorksheetObjectsTutorial.c.
- Near the top of the file, locate and click on the line:
PageBase pb;
You can position the cursor anywhere on the line.
- From the Code Builder menu, select Debug: Toggle Breakpoints. Alternately, press F9 or click the Toggle Breakpoint button
 on the Debug toolbar. on the Debug toolbar.
A brown circle is displayed in the gray margin to the left of the above line indicating that a Debug breakpoint has been set for that line.
- In the Code Builder workspace, activate the LabTalk Console (Command & Results window) and type in the following:
AccessWorksheetObjectsTutorial
- Press ENTER to execute the function.

- On the Debug toolbar, press the Step Into button

- Press the Step Into button repeatedly, stopping to read the comments for each statement. Periodically stop and resize and/or reposition the Local Variables window to view the current run-time value of each variable.
Accessing Graph Related Objects
- Return to the Origin workspace and, on the Standard toolbar, click the Open button .
- Locate the unzipped folder you created at step 1 of above section in this page. Browse to the \Origin C Examples\Programming Guide\Introduction to Accessing Origin Objects subfolder, select AccessGraphObjectsTutorial.OPJ, and click Open. You may be prompted to save changes to an untitled project. Click No and a worksheet and graph should open.
- From the Code Builder menu, select File: New Workspace. Click No when prompted to save workspace changes.
- In Code Builder, click the Open button .
- Locate the unzipped folder again. Browse to the Origin C Examples\Programming Guide\Introduction to Accessing Origin Objects subfolder, select AccessGraphObjectsTutorial.c, select the Add to Workspace check box, and click Open.
- Click the Rebuild All button to compile and link the file.
- On the Code Builder View menu, verify that the LabTalk Console (Command & Results) and the Local Variables windows are visible (the corresponding menu items should be checked).
- From the Code Builder menu, select Tools: Customize. Select the Toolbars tab and make sure that the Debug toolbar check box is selected.
- In the Code Builder workspace, activate AccessGraphObjectsTutorial.c.
- Near the top of the file locate and click on the line:
GraphPage gp;
You can position the cursor anywhere on the line.
- From the Code Builder menu, select Debug: Toggle Breakpoints. Alternately, press F9 or click the Toggle Breakpoint button on the Debug toolbar.
A brown circle is displayed in the gray margin to the left of the above line indicating that a Debug breakpoint has been set for that line.
- Activate the LabTalk Console (Command & Results window) in Code Builder and type the following:
AccessGraphObjectsTutorial
- Press ENTER to execute the function.
- On the Debug toolbar, press the Step Into button
- Press the Step Into button repeatedly, stopping to read the comments for each statement. Periodically stop and resize and/or reposition the Local Variables window to view the current run-time value of each variable.
This concludes the Internal Origin Objects tutorial.
|