1.7 The Options DialogThe-Options-Dialog
This dialog is used to set the layout for the development environment and the Text Editor. To open this dialog, you can select Tools: Options... on the menu bar or click the  button on the Edit toolbar. button on the Edit toolbar.
General under Environment
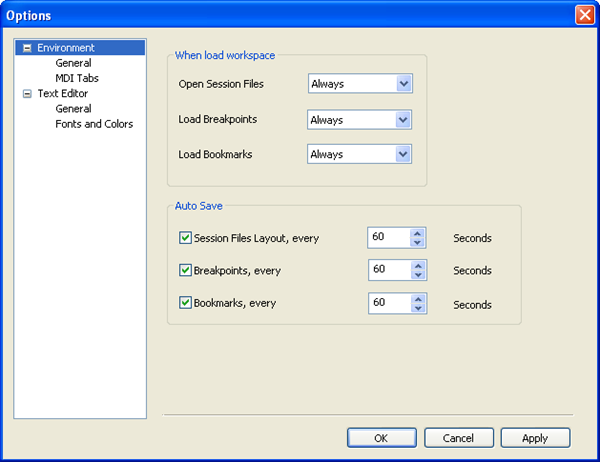
- When load workspace
- By selecting an option from the drop-down list, you can set the auto-loading options for session files, breakpoints, and bookmarks when opening Code Builder.
| Always
|
Always load the saved session files layout, breakpoints or bookmarks.
|
| Never
|
Open a new workspace.
|
| Ask
|
Pop up a dialog, prompting you to decide whether to load the saved session files layout, breakpoints or bookmarks.
|
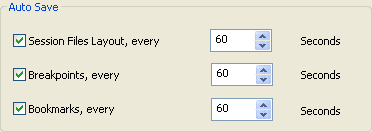
- Auto Save
- You can enable auto-saving the session files layout, breakpoints or bookmarks by checking the box before the option and specify a number in the
 box to set the intervals of auto-saving. box to set the intervals of auto-saving.
MDI Tabs under Environment
You can enable or disable MDI Tabs by selecting an option from the drop-down list.
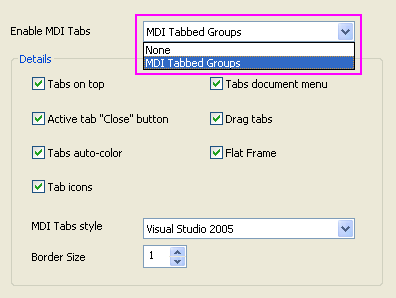
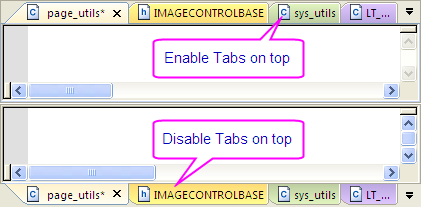
The difference between setting "Enable MDI Tabs" as None and as MDI Tabbed Groups is shown in the following graph.

Set Enable MDI Tabs as None, and options in the Details section will be unavailable. All options in the Details section are discussed in the following table:
| Tabs on top
|
When this option is enabled tabs will be displayed on the top of the Text Editor.
|
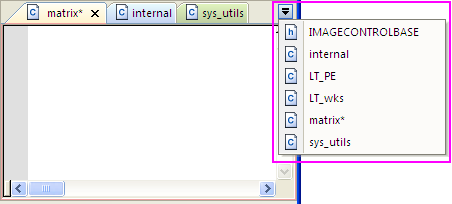
| Tabs document menu
|
When this option is enabled, the  button will appear on the up right end of the Text Editor. All files in Text Editor will be listed in alphabetical order in the menu. button will appear on the up right end of the Text Editor. All files in Text Editor will be listed in alphabetical order in the menu.
|
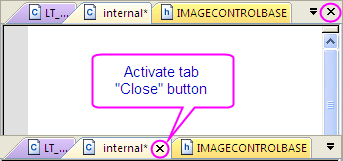
| Active tab "Close" button
|
When this option is enabled it will activate a  button on the tab. button on the tab.
|
| Drag tabs
|
When this option is enabled, you can reorder the tabs to bring frequently used files close together by drag-and-dropping tabs.
|
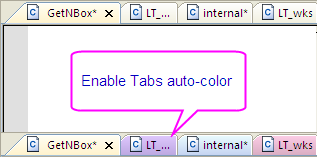
| Tabs auto-color
|
Auto fill the tabs with different colors.
|
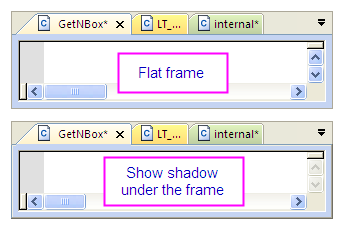
| Flat Frame
|
That un-check this box will show shadow under the frame.
|
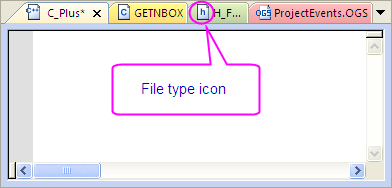
| Tab icons
|
When this option is enabled it will display a file type icon on the tab.
|
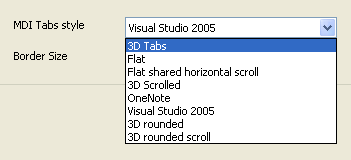
| MDI Tabs style
|
You can select a style from the drop-down list to change the appearance of the tabs.
|
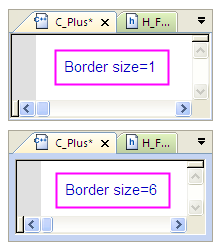
| Border Size
|
This option allows you to change the border size as you wish.
|
General under Text Editor
Select General node under Text Editor on the left panel, then on the right panel you can see a table of general setting variables for the Text Editor.
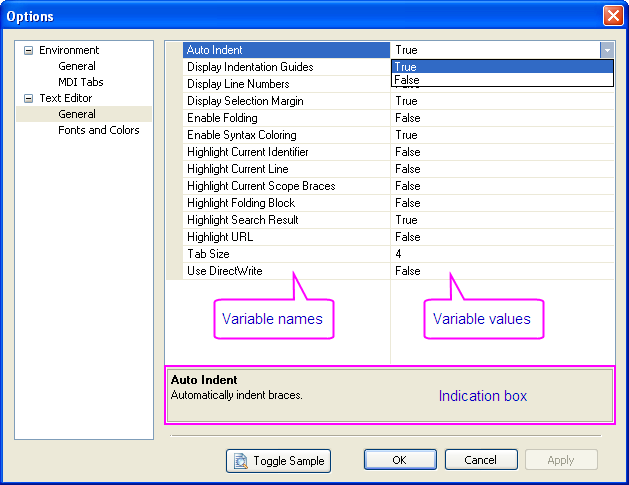
The first column contains the variable names, and the second column contains the values of the variables. To set the value for the variables of type bool, you can select True/False from the drop-down list or double click the variable to change the value.
| Note: When "Enable Syntax Coloring" is False, "Enable Folding" and "Highlight Folding Block" are not supported.
|
There is an indication box under the table. When the variable is selected a box will be displayed providing information on its usage.
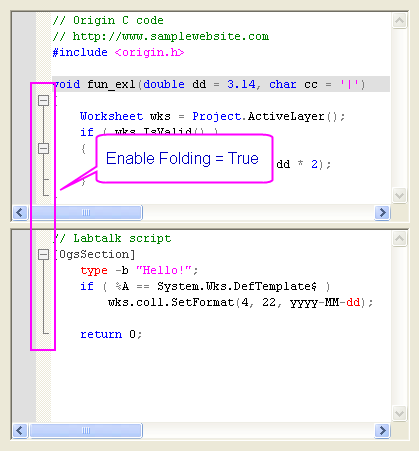
Furthermore, you can click the  button on the bottom of the dialog to open the sample window. In this window, before you apply the setting to the Text Editor, you can see what effect will have on the sample when changing the variable value. The following graph is the sample when "Enable Folding" is set as True. button on the bottom of the dialog to open the sample window. In this window, before you apply the setting to the Text Editor, you can see what effect will have on the sample when changing the variable value. The following graph is the sample when "Enable Folding" is set as True.
 | If a variable value is changed, it will appear bolded until you close the dialog.
|
Fonts and Colors under Text Editor
All settings relating to changing fonts and colors of the Text Editor can be found in the Fonts and Colors node under Text Editor.
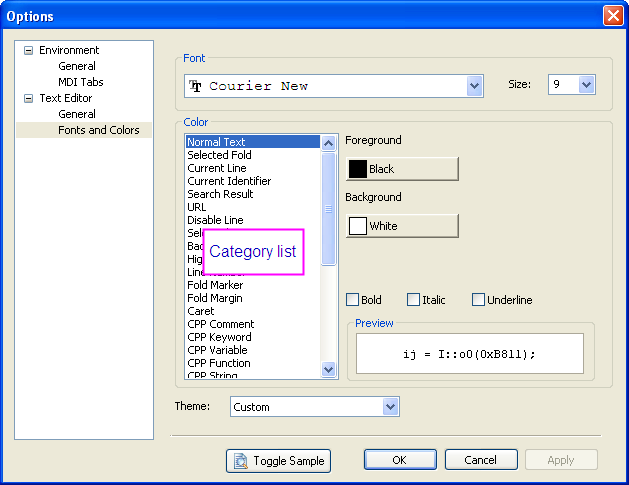
You can select a theme from the drop-down list of the Theme option to change the overall style of Text Editor. Or you can define a Custom theme by selecting the category from the list in the Color section and changing the style for the category. Once you apply the changes, the settings will be automatically saved in a Custom theme.
There is a Preview box at the bottom right of the dialog. The changes you made on the category can be seen immediately in the Preview box. Also, you can click the button to open the sample window, where you can preview the overall effect of all settings you changed.
|