9.2.2 Import WizardImportWizard
Summary
The Import Wizard allows you to import complicated ASCII files, extract variables from the import file name and header (for reuse in Origin), specify custom delimiters and date formats, or handle post-processing of your imported data using a custom LabTalk script. Moreover, you can save your custom settings to a filter (.oif) that can be used repeatedly to import the same or similarly-structured files.
What you will learn
This tutorial will show you how to use the Import Wizard to
- extract variables from both the file name and file headers
- save import settings and use them to import new data
Steps
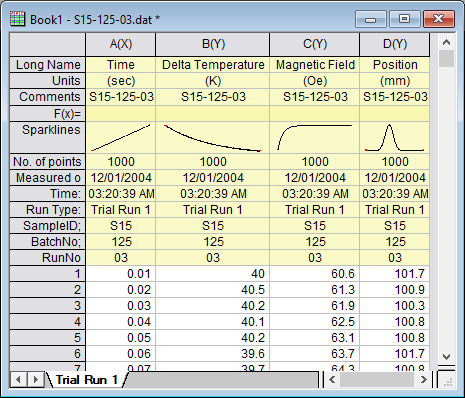
- Start with a new workbook. Select from menu Data: Import From File: Import Wizard to open the Import Wizard dialog. Click the browser button
 to the right of the File box. Browse to the folder \Samples\Import and Export and select the file S15-125-03.dat. to the right of the File box. Browse to the folder \Samples\Import and Export and select the file S15-125-03.dat.
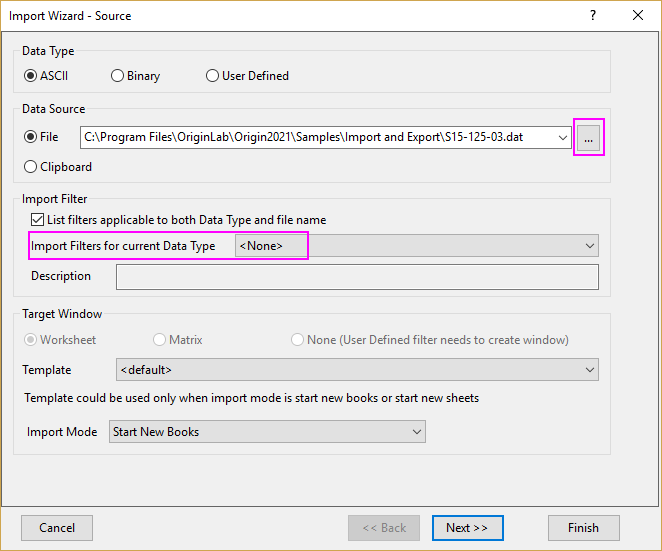
Note that an import filter of VarsFromFileNameAndHeader.oif is auto-selected for Import Filter> Import Filters for current Data Type. By default, if there is any import filter in the data folder, the filter will be auto-used to import the data. In this example, we will show you how to import this data step by step and create a similar filter. So we choose <None>.
Click Next.
- The Header Lines page enables you to easily customize the worksheet headers. The lower preview panel is especially helpful when you are importing a file with many lines of header like this example. Clear Auto determine header lines check box. To specify the main header lines, place the cursor on line 6 in the preview panel, and then click the button
 next to Main Header Lines: Fixed Number. Similarly, specify the Long Name and Unit line. next to Main Header Lines: Fixed Number. Similarly, specify the Long Name and Unit line.
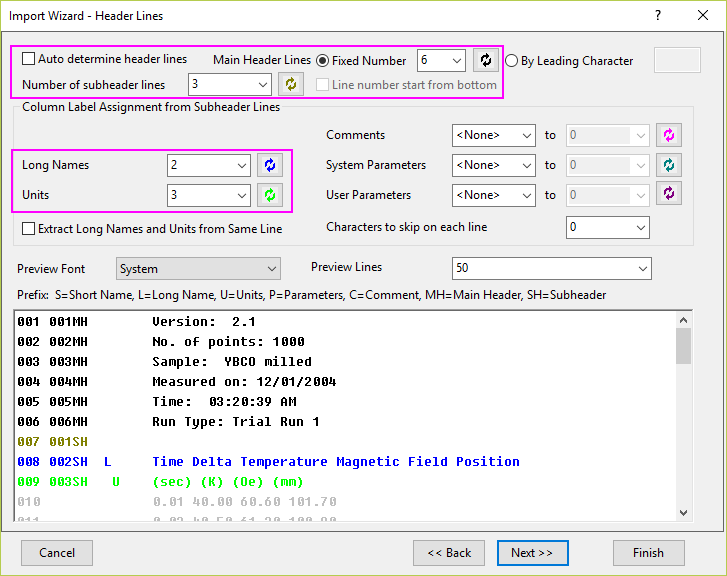
Click Next.
- The Variable Extraction page allows you to extract variables from file name and file headers, which can be saved in page info, put into column header lines, or used in annotating a graph. Select Specify location of variable names and values using delimiters, Add variables to page info and Create User Parameter rows for each variable.
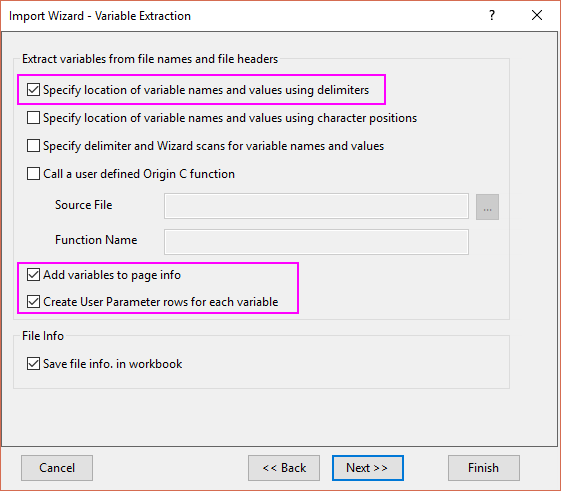
Click Next.
- The Variable Extraction by Delimiter page allows you to extract variable names and values from file metadata using specified delimiters. This information is then used to create worksheet User-defined Parameter rows and is also then available for use in text objects, etc.
To extract data, go to the Variable group and set fields or enter text, as shown in the table below this image. Note that:
- There are two radio buttons -- Enter variable name and Extract variable name from file -- and that a slightly different set of controls is exposed, depending on which radio is chosen.
- The controls are a mix of text boxes and drop-down lists and for drop-down lists, you should be able to select the correct entry from the drop-down list.
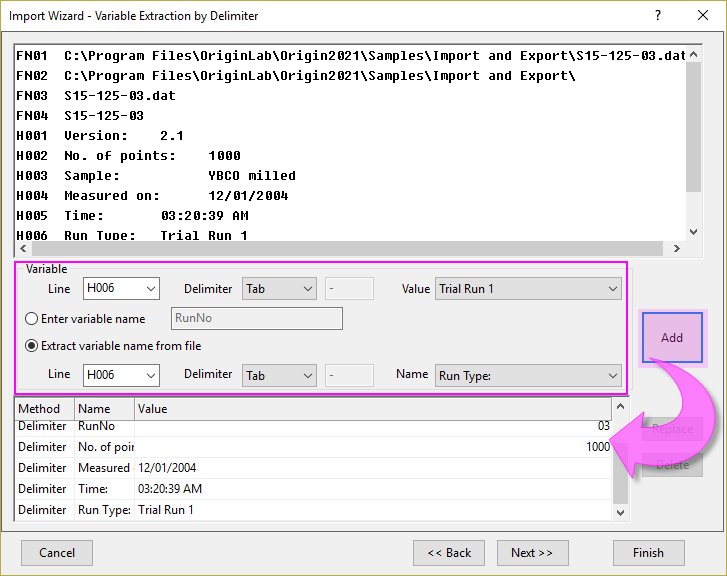
Note that after each Line of table data is set in the dialog, you must click the Add button before starting on the next Line.
| Line
|
Delimiter
|
enter
|
Value
|
Enter variable name
|
Line
|
Delimiter
|
Extract variable name from file
|
| FN04
|
Other
|
-
|
S15
|
SampleID
|
|
|
|
| FN04
|
Other
|
-
|
125
|
BatchNo
|
|
|
|
| FN04
|
Other
|
-
|
03
|
RunNo
|
|
|
|
| H002
|
Colon
|
|
1000
|
|
H002
|
Colon
|
No. of points
|
| H004
|
Colon
|
|
Measured on
|
|
H004
|
Colon
|
12/01/2004
|
| H005
|
Tab
|
|
Time
|
|
H005
|
Tab
|
03:20:39 AM
|
| H006
|
Tab
|
|
Run Type:
|
|
H006
|
Tab
|
Trial Run 1
|
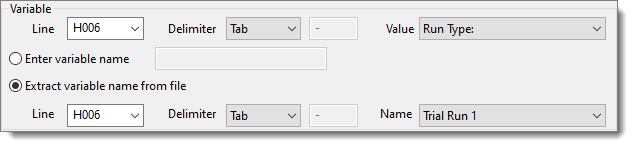
This example shows how Line = H006 controls should be set:
When you have added all lines from the above table, click Next.
- On the File Name Options page, select worksheet with variable checkbox and choose RunType from the combo box drop-down list to rename the worksheet by variable RunType. Also select Rename Long Name for Book only and Append file name to column comments.
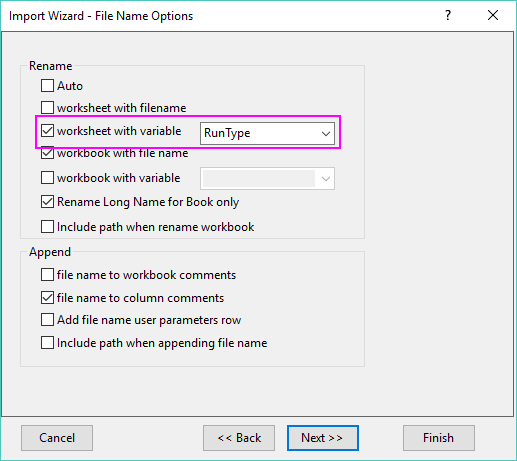
Click Next
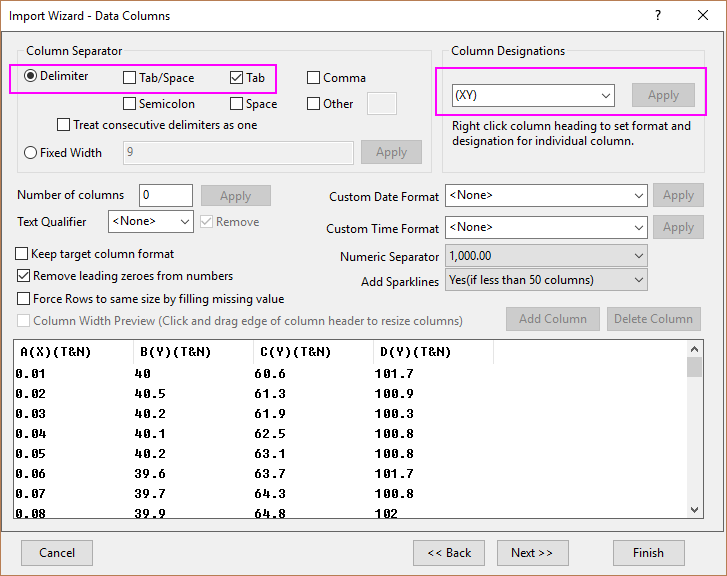
- On the Data Columns page, select Tab for Column Separator > Delimiter, and from the drop-down list, choose (XY) for the Column Designations. Click Apply button to preview the data columns in the bottom panel.
- Click Next twice to go to the Save Filters page. To use these settings again, you can save this import procedure as a filter. Select the Save filter check box and type a filter name in the Filter file name text box (MyFilter in this example).
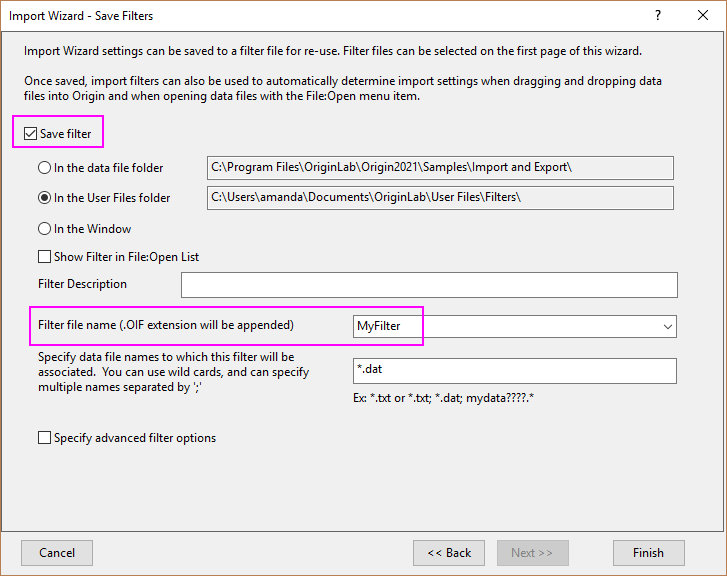
Click Finish to import the data.
- Open Import Wizard dialog again. This time, select file <Origin installation folder>\Samples\Import and Export\S21-235-07.dat. You can select MyFilter filter just saved from Import Filters for current Type.
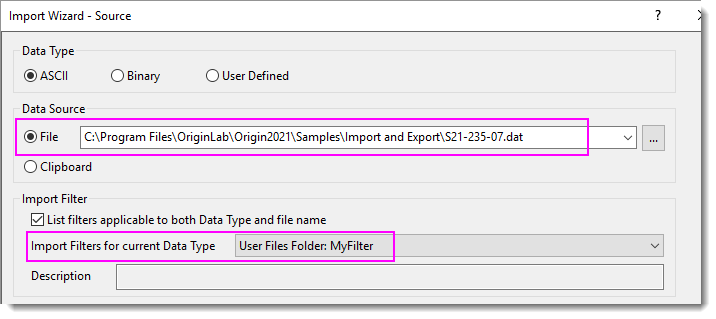
Click Finish button directly. The settings in MyFilter will be used to import the file.
|