4.1.3.3 Build Resource-only DLL in Visual Studio 2015
The Origin Dialog Project Template (odialog.awx) is only compatible with Visual Studio 6. This article will walk you through the steps necessary to make a resource-only DLL using Visual Studio 2008, 2010, 2012 and 2015 Community. It will then show you how to use your DLL in Origin C.
Creating a Resource-Only DLL
Here is an example of how to build a resource-only DLL that is accessible in Origin C. After following these steps you will have a Visual Studio solution for building a 32-bit DLL. The next section will then show you how to add 64-bit support to your solution.
- Launch Visual Studio.(This example has been tested in Visual Studio Community 2015.)
- Select "File > New > Project..." to create a new project.
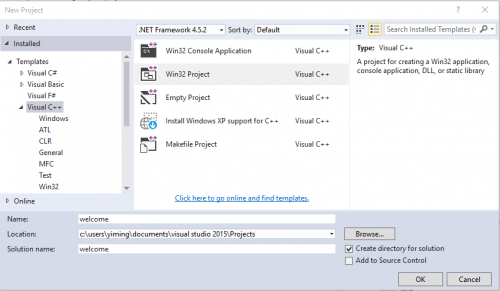
- In the "New Project" dialog:
- Select "Visual C++" templates.
- Select "Win32 Project".
- Enter a name for your project. For this example we will name our project "Welcome".
- Click the OK button.
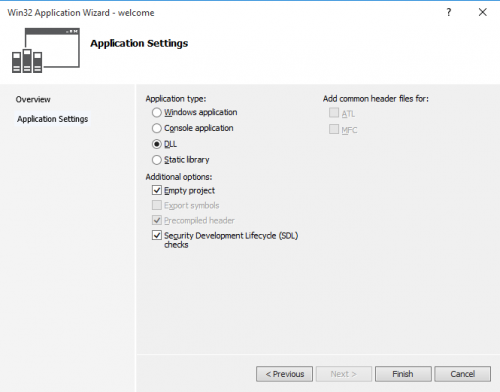
- In the "Win32 Application Wizard" dialog:
- Click "Next" until you see "Application Settings".
- Set "Application type" to "DLL".
- Under "Additional options", check "Empty project".
- Click the Finish button.
- In "Solution Explorer", right-click on the project group and choose Properties.
- In the "Properties Pages" dialog:
- Set Configuration to "All Configurations".
- Expand "Configuration Properties".
- Select "General".
- Set "Character Set" to "Use Multi-Byte Character Set".
- Expand "Linker".
- Select "Advanced".
- Set "No Entry Point" to "Yes".
- Click the OK button.
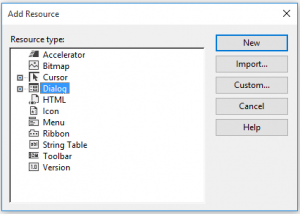
- In "Solution Explorer", right-click on the project group and choose "Add > Resource...".
- In the "Add Resource" dialog:
- Select Dialog.
- Click the New button.
- In the dialog editor, add an "Edit Control" to the dialog by drag&drop the control from the Toolbox bar.
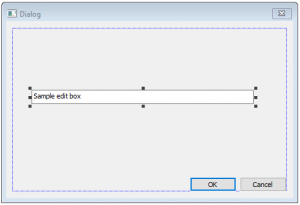
- Select "File > Save All".
- Select "Build > Rebuild Solution".
When you build 32-bit DLLs, Visual Studio creates the DLLs in the Debug and Release sub folders of your Visual Studio's project folder.
Creating a 64-Bit Resource-Only DLL
The above steps will create a 32-bit resource-only DLL. The following steps will show you how to create a 64-bit resource-only DLL by adding an x64 (64-bit) configuration to your Visual Studio project.
- Select "View > Property Pages".
- Click the "Configuration Manager" button in the top right corner to open the "Configuration Manager" dialog.
- In the "Active solution platform" drop-down, select New to open the "New Solution Platform" dialog.
- Set Type to x64
- Click the OK button.
- Back in the "Configuration Manager" dialog, click the Close button.
- Set Platform to x64.
- Change "Target Name" from "$(ProjectName)" to "$(ProjectName)_64".
- Click the OK button.
Now you can switch between making a 32-bit (Win32) and a 64-bit (x64) DLL using the "Solutions Platform" setting in the toolbar.
When you build 32-bit DLLs, Visual Studio creates the DLLs in the Debug and Release sub folders of your Visual Studio's project folder. For 64-bit DLLs, they will be created in the x64\Debug and x64\Release sub folders of your Visual Studio's project folder.
Using a Resource-Only DLL in Origin C
Now that you have created a resource-only DLL using the steps above, we will show you how to use the DLL in Origin C.
Copy the DLL and Resource Header into Origin C
The first step is to copy the DLL and the resource header file to the Origin C sub folder in your User Files folder.
As noted above, Visual Studio creates the 32-bit DLLs in the Debug and Release sub folders of your Visual Studio's project folder and the 64-bit DLLs are created in the x64\Debug and x64\Release sub folders.
The default name of the resource header file is resource.h and it is located in a sub folder with the same name as your Visual Studio's project folder. For example, the Welcome project we created above is in a folder named Welcome. That folder contains a sub folder also named Welcome.
The resource header file in this case is: .\Welcome\Welcome\resource.h
Later versions of Visual Studio will create this header file with unicode encoding. Origin C can not read this encoding so you can not simply copy the file to your Origin C folder. Instead, you need to convert the file from unicode to ANSI.
- Open the header file in Windows Notepad.
- Do "File > Save As..."
- Navigate to the Origin C sub folder in your User Files folder.
- Set Encoding to ANSI.
- Click the Save button.
Writing Origin C code to Display the Dialog
At this point you should have created your DLL and copied it and it's resource header file to the Origin C sub folder in your User Files folder. Now we will write the Origin C code that will display the dialog and handle events.
- Start Origin and open Code Builder.
- In Code Builder select "File > New" to create a new C file.
- Copy the Origin C code below and paste it at the end of your new C file.
- Select "Build > Build".
- In Code Builder's "Command & Results" window type "DoMyDialog" and press Enter.
- When the Welcome dialog appears enter a message into the edit control and click OK.
#include <Dialog.h>
#include "resource.h"


class MyDialog : public Dialog
{
public:
	MyDialog() : Dialog(IDD_DIALOG1, "Welcome")
	{
	}

	int DoModal(HWND hParent = NULL)
	{
		InitMsgMap();
		int nRet = Dialog::DoModal(hParent);
		return nRet;
	}

protected:
	EVENTS_BEGIN
		ON_INIT(OnInitDialog)
		ON_OK(OnOK)
		ON_CANCEL(OnCancel)
	EVENTS_END

	BOOL OnInitDialog()
	{
		this->Text = "Welcome";
		m_editCtrl = GetItem(IDC_EDIT1);
		m_editCtrl.Text = "Enter a message here.";
		return TRUE;
	}

	BOOL OnOK()
	{
		MessageBox(GetSafeHwnd(), m_editCtrl.Text, this->Text);
		return TRUE;
	}

	BOOL OnCancel()
	{
		return TRUE;
	}

	Edit m_editCtrl;
};


bool DoMyDialog()
{
	MyDialog myDlg;
	myDlg.DoModal( GetWindow() );
	return true;
}
|