4 Working with the Text EditorWorking-With-The-Text-Editor
Code Builder provides a text editor window for viewing, editing, and printing source, header, LabTalk script, and text files. When you open a file in Code Builder, the file opens in a new text editor window in the Multiple Document Interface (MDI) region of Code Builder.
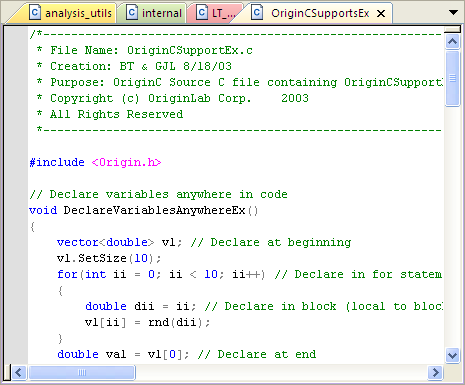
You can drag-and-drop the tab of a text editor window to the editing region, which will arrange the text editor window side by side with the others. And you can always drag it back to stack them together.
The Text Editor window supports standard keyboard and mouse text selection and cursor control. You can also perform the following editing operations:
- Cut, copy, paste, and delete text.
- Undo and redo your editing actions.
- Drag (copy) selected text between the Text Editor windows.
- Drag (move) selected text within a Text Editor window.
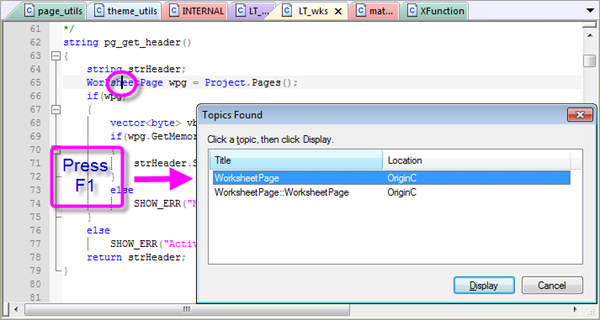
- Press F1 to bring up the related Help window when the cursor is on a function.
To customize the appearance or font style for your Text Editor, see The Options Dialog.
Context Sensitive Programming Help
Context-sensitive Help is available in the Code Builder text editor. To call Help for any Origin C function or class, place the cursor in a keyword and press the F1 key.
Changing the Active Text Editor Window
To change the active text editor window when multiple windows are open in the MDI, perform one of the following operations:
- Select the window from the Window menu.
- Click on the window in the MDI.
- Double-click on the file's icon in the workspace window tree (if the file has been added to the workspace).
- Press CTRL+TAB to activate the next window or press CTRL+SHIFT+TAB to activate the previous window.
Working with Multiple Views of the Same File
If you have too many lines of code in a single source file, you may want to view different sections of your code at the same time. To do this, perform one of the following operations:
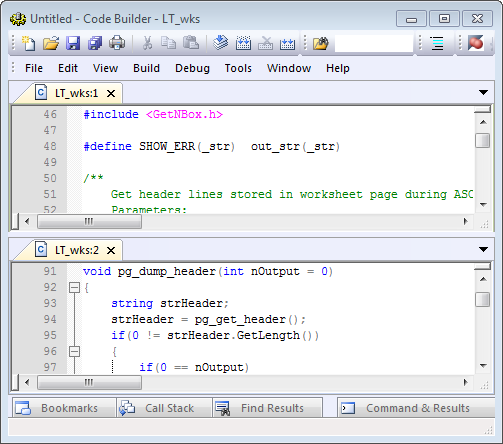
- To open a second instance of a file in a text editor window, activate the desired window in the MDI and then select Window:New Window. The first window is renamed with a :1 suffix (for example, MyFitFunctions.c:1). The second window is named with a :2 suffix (for example, MyFitFunctions.c:2). You can scroll each window independently. You can also edit either window. Changes you make to one window are reflected in the other.
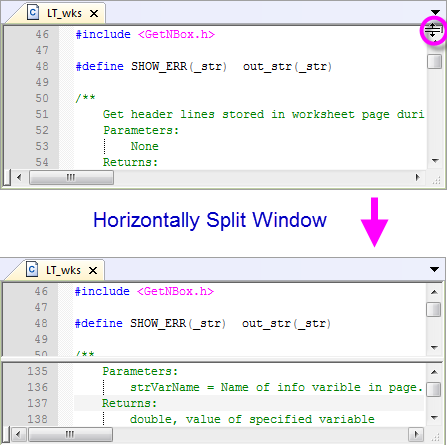
- You can horizontally split a window into two view panels. To do this, position the mouse pointer over the split box which is located above the arrow at the top of the window's vertical scroll bar. When the pointer changes to a double arrow, drag the split box down to create the second view pane. You can now make changes to your source file from either view pane.
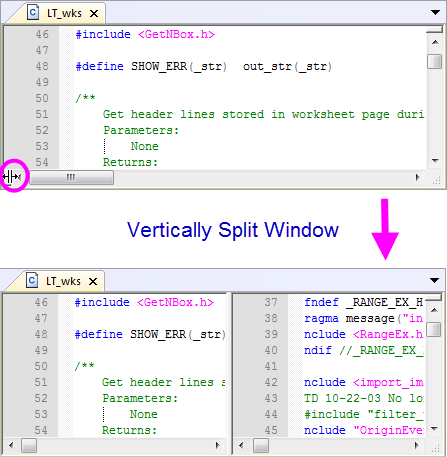
- You can also vertically split a window into two view panels. To do this, position the mouse pointer over the split box which is located to the left of the arrow at the left of the window's horizontal scroll bar. When the pointer changes to a double arrow, drag the split box to the right to create the second view pane. You can now make changes to your source file from either view pane.
Customizing the Text Editor
The following settings in the text editor can be customized:
- Tabs and indents.
- Font, font style, and font size.
(To learn how to customize the colors used for different elements of your code, see Syntax Coloring.)
Setting Tabs and Indents
By default, the text editor automatically indents your text depending on the previous lines of code. For example, if the previous line is an open brace {, the text editor will automatically indent the next line of code. To disable or enable the auto indent feature, select Tools:Options and then clear or select the Auto Indent check box.
To change the tab and indent size, select Tools:Options and then edit the Tab Width combo box. (To return to the default settings, select Tools:Reset Options.)
To show tabs (and spaces) in the text editor window, select View:Show Tabs and Spaces.
Setting the Font, Font Style, and Font Size
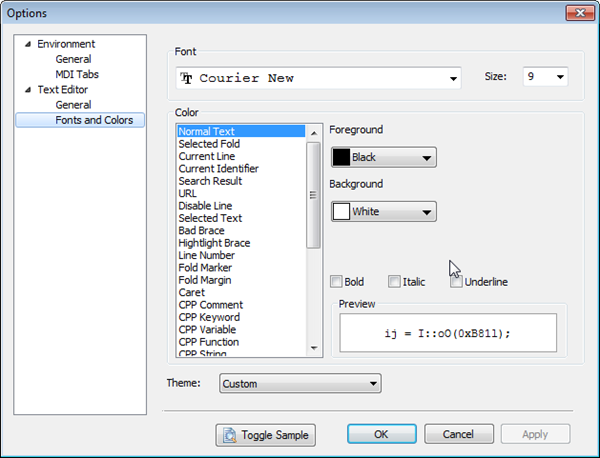
To set the font, font style, and font size for the text editor windows, select Tools:Options and then click the Font button. After making your selection from the Font, Font Style, and Size controls, the Sample view box displays a preview.
| Note: To return to the default settings, select Tools:Reset Options.
|
Syntax Coloring
To make your code easier to read and edit, the text editor automatically displays different elements of your code using different colors.
- To turn syntax coloring on and off, select View:Enable Syntax Coloring. This menu command is checked when selected (on) and unchecked when not selected (off).
- To customize the colors used for the different code elements, select Tools:Options and expand Text Editor to choose Fonts and Colors in the Options dialog.
Select the desired code element from the Colors list box and then select the new color from the lower drop-down list.
| Note: To return the syntax coloring to the default settings, select Tools:Reset Options.
|
Searching for Text
Code Builder provides tools for searching for strings in the active MDI file or in multiple files.
To locate a string in the active MDI file:
- Type your search string in the combo box located on the Search toolbar and press ENTER. The first found instance of the string becomes highlighted in the MDI window. Press ENTER again to highlight the next instance of the string. Continue this process.

- For more control over the search process, open the Find or Replace dialog boxes.
- To open the Find dialog box, click the Find button
 on the Edit toolbar or select Edit:Search. on the Edit toolbar or select Edit:Search.
- To open the Replace dialog box, click the Replace button
 on the Edit toolbar or select Edit:Replace. on the Edit toolbar or select Edit:Replace.
For both dialog boxes, type the desired search string in the Find What combo box. Code Builder retains your search string for future access. To access previous search strings, click the down arrow to open the Find What combo box.
To limit your search to instances of the string that are whole words, select the Match Whole Word Only check box. A whole word is a string that is surrounded by white space or punctuation, unless the string occurs at the start or end of a line. If the Match Whole Word Only check box is cleared, the search finds all matches of the string.
To perform a case sensitive search, select the Match Case check box.
The Find dialog box allows you to specify the search direction in the file (up or down from the current cursor location). The Replace dialog box allows you to replace strings in the currently selected text (there must be text highlighted for this option to be available) or in the entire file.
Searching for Text in Multiple Files
To find files that contain a specified character string, select Edit:Find in Files or click the Find in Files button  on the Standard toolbar. Both actions open the Find in Files dialog box. For more information, see Locating Files that Contain a Specified Character String. on the Standard toolbar. Both actions open the Find in Files dialog box. For more information, see Locating Files that Contain a Specified Character String.
Create and Insert Code Snippets
With Origin C based files (.c, .cpp, .h), you can define code snippet(s) directly from the Snippet Editor ( Tools:Snippet Editor...) or highlight parts of your code, right click and select Create Snippet from Selection.
Once the snippet(s) are defined, you could insert it/them to other parts of your Origin C file. To do this, right click in the text editor and select Insert Snippet:Snippet Title (or use the hot key Shift + Alt + X).
Note that when there are more than one snippets defined, the Shift + Alt + X hot key opens a context menu with all available snippets, but if there is only one snippet, it directly insert that snippet to the current cursor position.
Navigating in a File
Text editor windows support standard keyboard and mouse file navigation methods. In addition, you can navigate in a file using the following techniques:
Using Navigate Toolbar
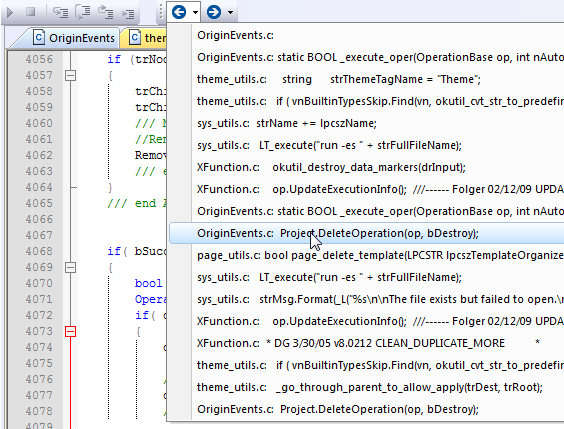
When you edit within a same source file or among different source files in Code Builder, up to 20 history locations will be automatically recorded. Then you can use Navigate Back button  or Navigate Forward button or Navigate Forward button  in Navigate toolbar to navigate back and forth in Code Builder. in Navigate toolbar to navigate back and forth in Code Builder.
If you want to navigate to a particular history position, you can choose from the drop-down list from the down-sided triangle button right beside Navigate Back or Navigate Forward button as shown in the following:
Using Bookmarks
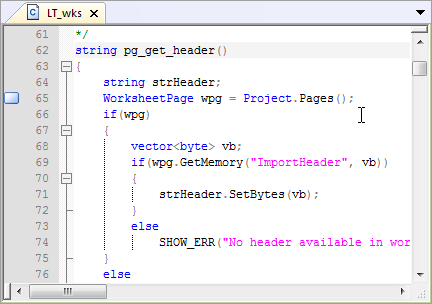
Bookmarks allow you to flag lines of code so that you can easily return to the line later. To set a bookmark, click in the desired line and then click the Toggle Bookmark button  on the Edit toolbar. Alternatively, click in the desired line and select Edit:Toggle Bookmark or right-click and select Toggle Bookmark. After you set a bookmark, a blue-filled rectangle displays in the margin for that line. on the Edit toolbar. Alternatively, click in the desired line and select Edit:Toggle Bookmark or right-click and select Toggle Bookmark. After you set a bookmark, a blue-filled rectangle displays in the margin for that line.
Click the Next Bookmark button  to go to the next bookmark in the file. Click the Previous Bookmark button to go to the next bookmark in the file. Click the Previous Bookmark button  to go to the previous bookmark. to go to the previous bookmark.
To remove a bookmark, click in the desired line and then re-click the Toggle Bookmark button. To remove all the bookmarks in the current file, click the Clear Bookmarks button  on the Edit toolbar. on the Edit toolbar.
Going to the Matching Brace
If the cursor is active before or after an opening or closing brace {}, bracket [], or parenthesis (), click the Go to Matching Brace button  on the Edit toolbar or select Edit:Go to Matching Brace to highlight the matching brace. on the Edit toolbar or select Edit:Go to Matching Brace to highlight the matching brace.
Using the Find Dialog Box
If you want to go to the section of your file that contains a specific string, enter your string in the search string combo box located on the Search toolbar or in the Find dialog box (click the Find button on the Edit toolbar). For more information, see Searching for Text.
Using the Workspace Tree in the Workspace Window
For each compiled source file, you can activate the display of workspace tree icons for the function definitions, function declarations, classes, structures, and type definitions encountered during compilation. This display feature is available from the source file's shortcut menu in the workspace tree.
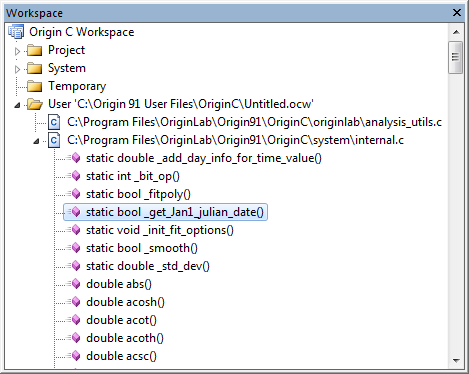
You can then double-click on an icon in the workspace tree (for example, a function definition) to go to the respective location in the source file. For more information, see Navigating in Files Using the Workspace Tree.
|